There are several ways of opening files. The standard way is through the Open dialog (File - Open). You can also paste images (from the system clipboard) simply by pressing Ctrl + V. Another way is to open files by dragging them from your local system and dropping them into the Photopea environment inside a web browser.
When you have no documents opened, dropped files will be opened in a regular way. When some documents are already open in Photopea, you can drop new document into the main area of the current document. The new file will be inserted into the current document as a new layer (a Smart Object layer).
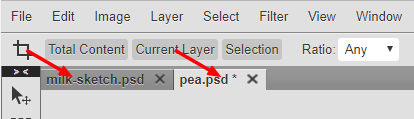
When some documents are opened, you can drop new files into the top bar of the main area (which contains the list of opened documents). Then, new files will be opened separately.

There is an experimental feature, which allows you take pictures using the camera of your device right inside Photopea. Press File - Take a picture to take a picture.
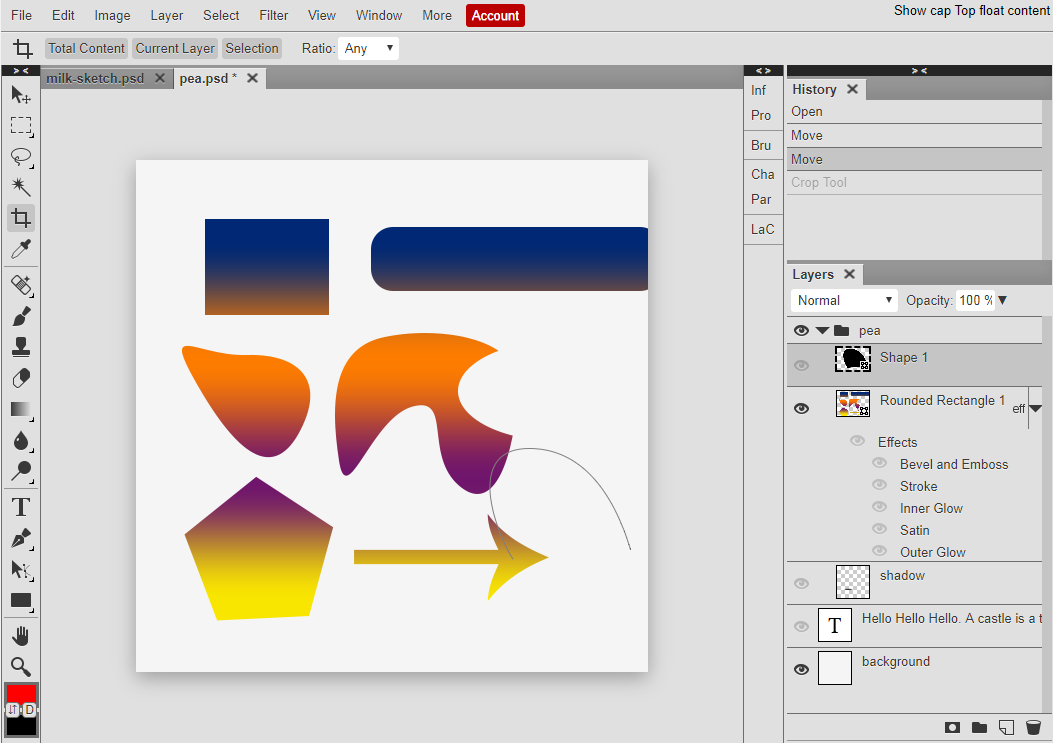
The workspace of Photopea is very similar to other image editors. It consists of the Toolbar on the left, the Sidebar on the right, the Working area in the middle and the Top menu at the top.
The toolbar contains all available tools. You can switch tools by clicking on their icons in the toolbar. Only one tool can be active at a time. Icons with a little arrow in the corner (e.g. Lasso tool) contain the whole group of related tools. Click on them to see the menu, then choose a specific tool from that menu.
Hold your mouse over the tool icon for a moment to see the name of that tool. Some tools have capital letters attached to them (e.g. B for Brush tool). You can also switch tools by pressing corresponding keys on your keyboard.
There is the foreground and the background color at the bottom of the toolbar. It is a simple palette of two colors, which are used by some tools. You can swap them with the X button, or reset to default values (black and white) with a D button.
The sidebar consists of two vertical columns. Each column can be folded and unfolded by clicking the thick line at the top of the column.
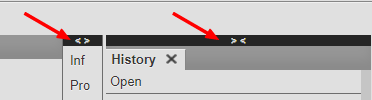
These columns contain panels (Layers, History, Paragraph ...), that you may need during your work. When the column is unfolded, you can see multiple panels, that are inside. When the column is folded, you can show and hide a specific panel by clicking the corresponding button in the column.
If you don't know where a specific panel is located, press Window - name of that panel.
Photopea allows you to open multiple documents (e.g. JPG images) at the same time. The list of opened documents is shown in the bar at the top of the main area.
Here you can switch between documents and choose the one that you want to work with. You can also close documents by pressing the cross next to the document name. Below that bar, in the middle of the workspace, is the actual content of your document. It is the active area, where you can draw, move objects etc.
The top menu consists of two parts the first part (File, Edit, Image ...) is the main menu of Photopea. It is always the same.
The second part (below the main menu) contains parameters of the current tool. It has a different content for each tool. For example, for the Brush tool, it contains the opacity of the brush, while for the Type tool, it contains the size of characters.
Background Colour
Font Face
Font Size
Text Colour