Section outline
-
 Free Transform
Free Transform is the basic tool for doing transformations. It works as any other regular tool, but it is not present in the toolbar. You can enable it by clicking Edit - Free Transform, or Alt + Ctrl + T.
When you enable Free Transform, the transformation will be applied to the layers, that are currently selected, i.e. to the same layers (or their parts), which would be moved by the Move tool at that moment. As you enable it, the transformation rectangle will appear around the transformed content. It has four control points on corners, four control points on sides and the rotation center at the middle.

Press and drag inside the rectangle to move it. Press and drag outside the rectangle to rotate it. Press and drag its corners to change its size. Press and drag its sides to scale it horizontally or vertically. When the Ctrl key is down, press and drag the side to skew the content.
Besides moving the rectangle, you can set transformation parameters directly in the top menu. Following parameters are available.

- X, Y: the position of the object
- W, H: Width and Height. Add "%" or "px" for the value in percent or in pixels
- Angle: the rotation of the object (in degrees)
- Skew X, Y: the skew of the object
When the Free Transform is enabled, the environment is locked and you can not do anything else. Once you finish the transforming, confirm it or cancel it using buttons in the top menu. You can also confirm it with the Enter key, or cancel it with the Escape key.
Common transforms
When you need to do a "common" transform (such as rotating 90 degrees, or "mirror" the image left-to-right), you can do it much faster. Press Edit - Transform - ... and choose one of predefined transformations.
Perspective transform
Scaling, rotating and skewing the content may be not enough. Imagine, that you need to put your image on a flat surface, that is viewed from the side. The edge, that is near, must be longer, and the edge, that is far, must be shorter.
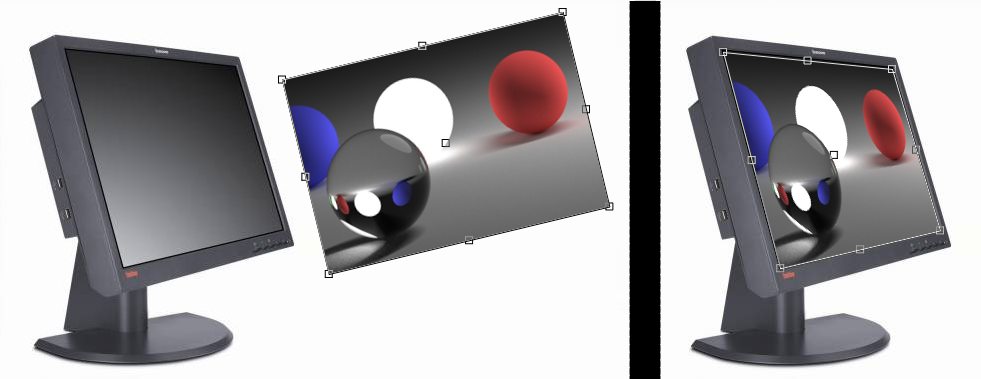
You can do it with the perspective transform. Just hold Ctrl key and drag corners: you will be able to move each corner separately, to achieve the 3D effect.
Warping
Perspective transform may let us do a 3D transformation of an image, but it is still not enough in some cases. Sometimes, we may want to place an image on the surface, which is not flat (a cylinder or a ball). In these cases, we would like to "bend" the image into a more interesting shape.
Warp allows us to bend the rectangular area using 16 control points. There are four control points for the location of corners, each corner has two control points for the direction of edges near that corner (8 more points) and there are four control points for the center of the image.
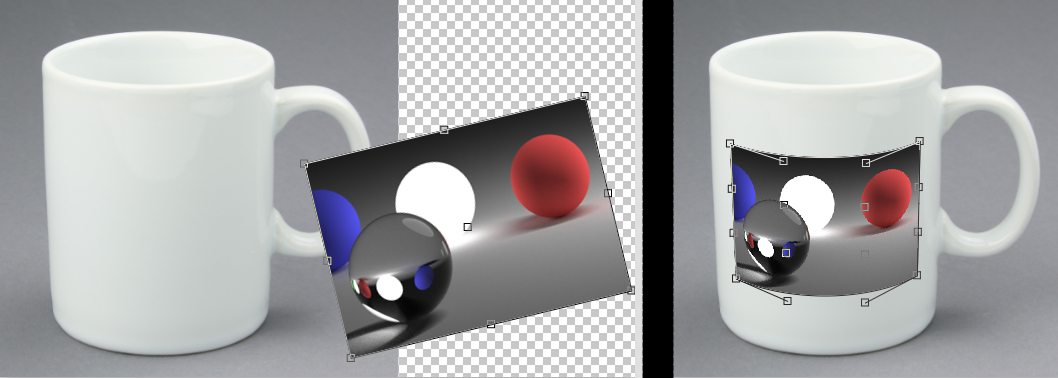
When the Free Transform is on, there will be a "Warp" button in the top panel. Click it to switch between a standard editing mode and a warp editing mode. There are also several predefined shapes, such as Arch or Flag, so you don't have to move points manually.
Background Colour
Font Size
Font Face
Font Kerning
Text Colour
Image Visibility
Letter Spacing
Line Height
Link Highlight
Text Alignment